

There are many ways to go about adding solar to your arsenal of energy generating– essential for boondocking(non shore power situations). It seems just the propane detector and fridge (running on propane but still pulling electricity for the electronics) drain the battery in a day or two. Solar makes a gas generator unnecessary for keeping the battery at good levels. We have camped in very wooded sites and always been able to move the panels around to the keyholes of sun enough to keep a good charge.
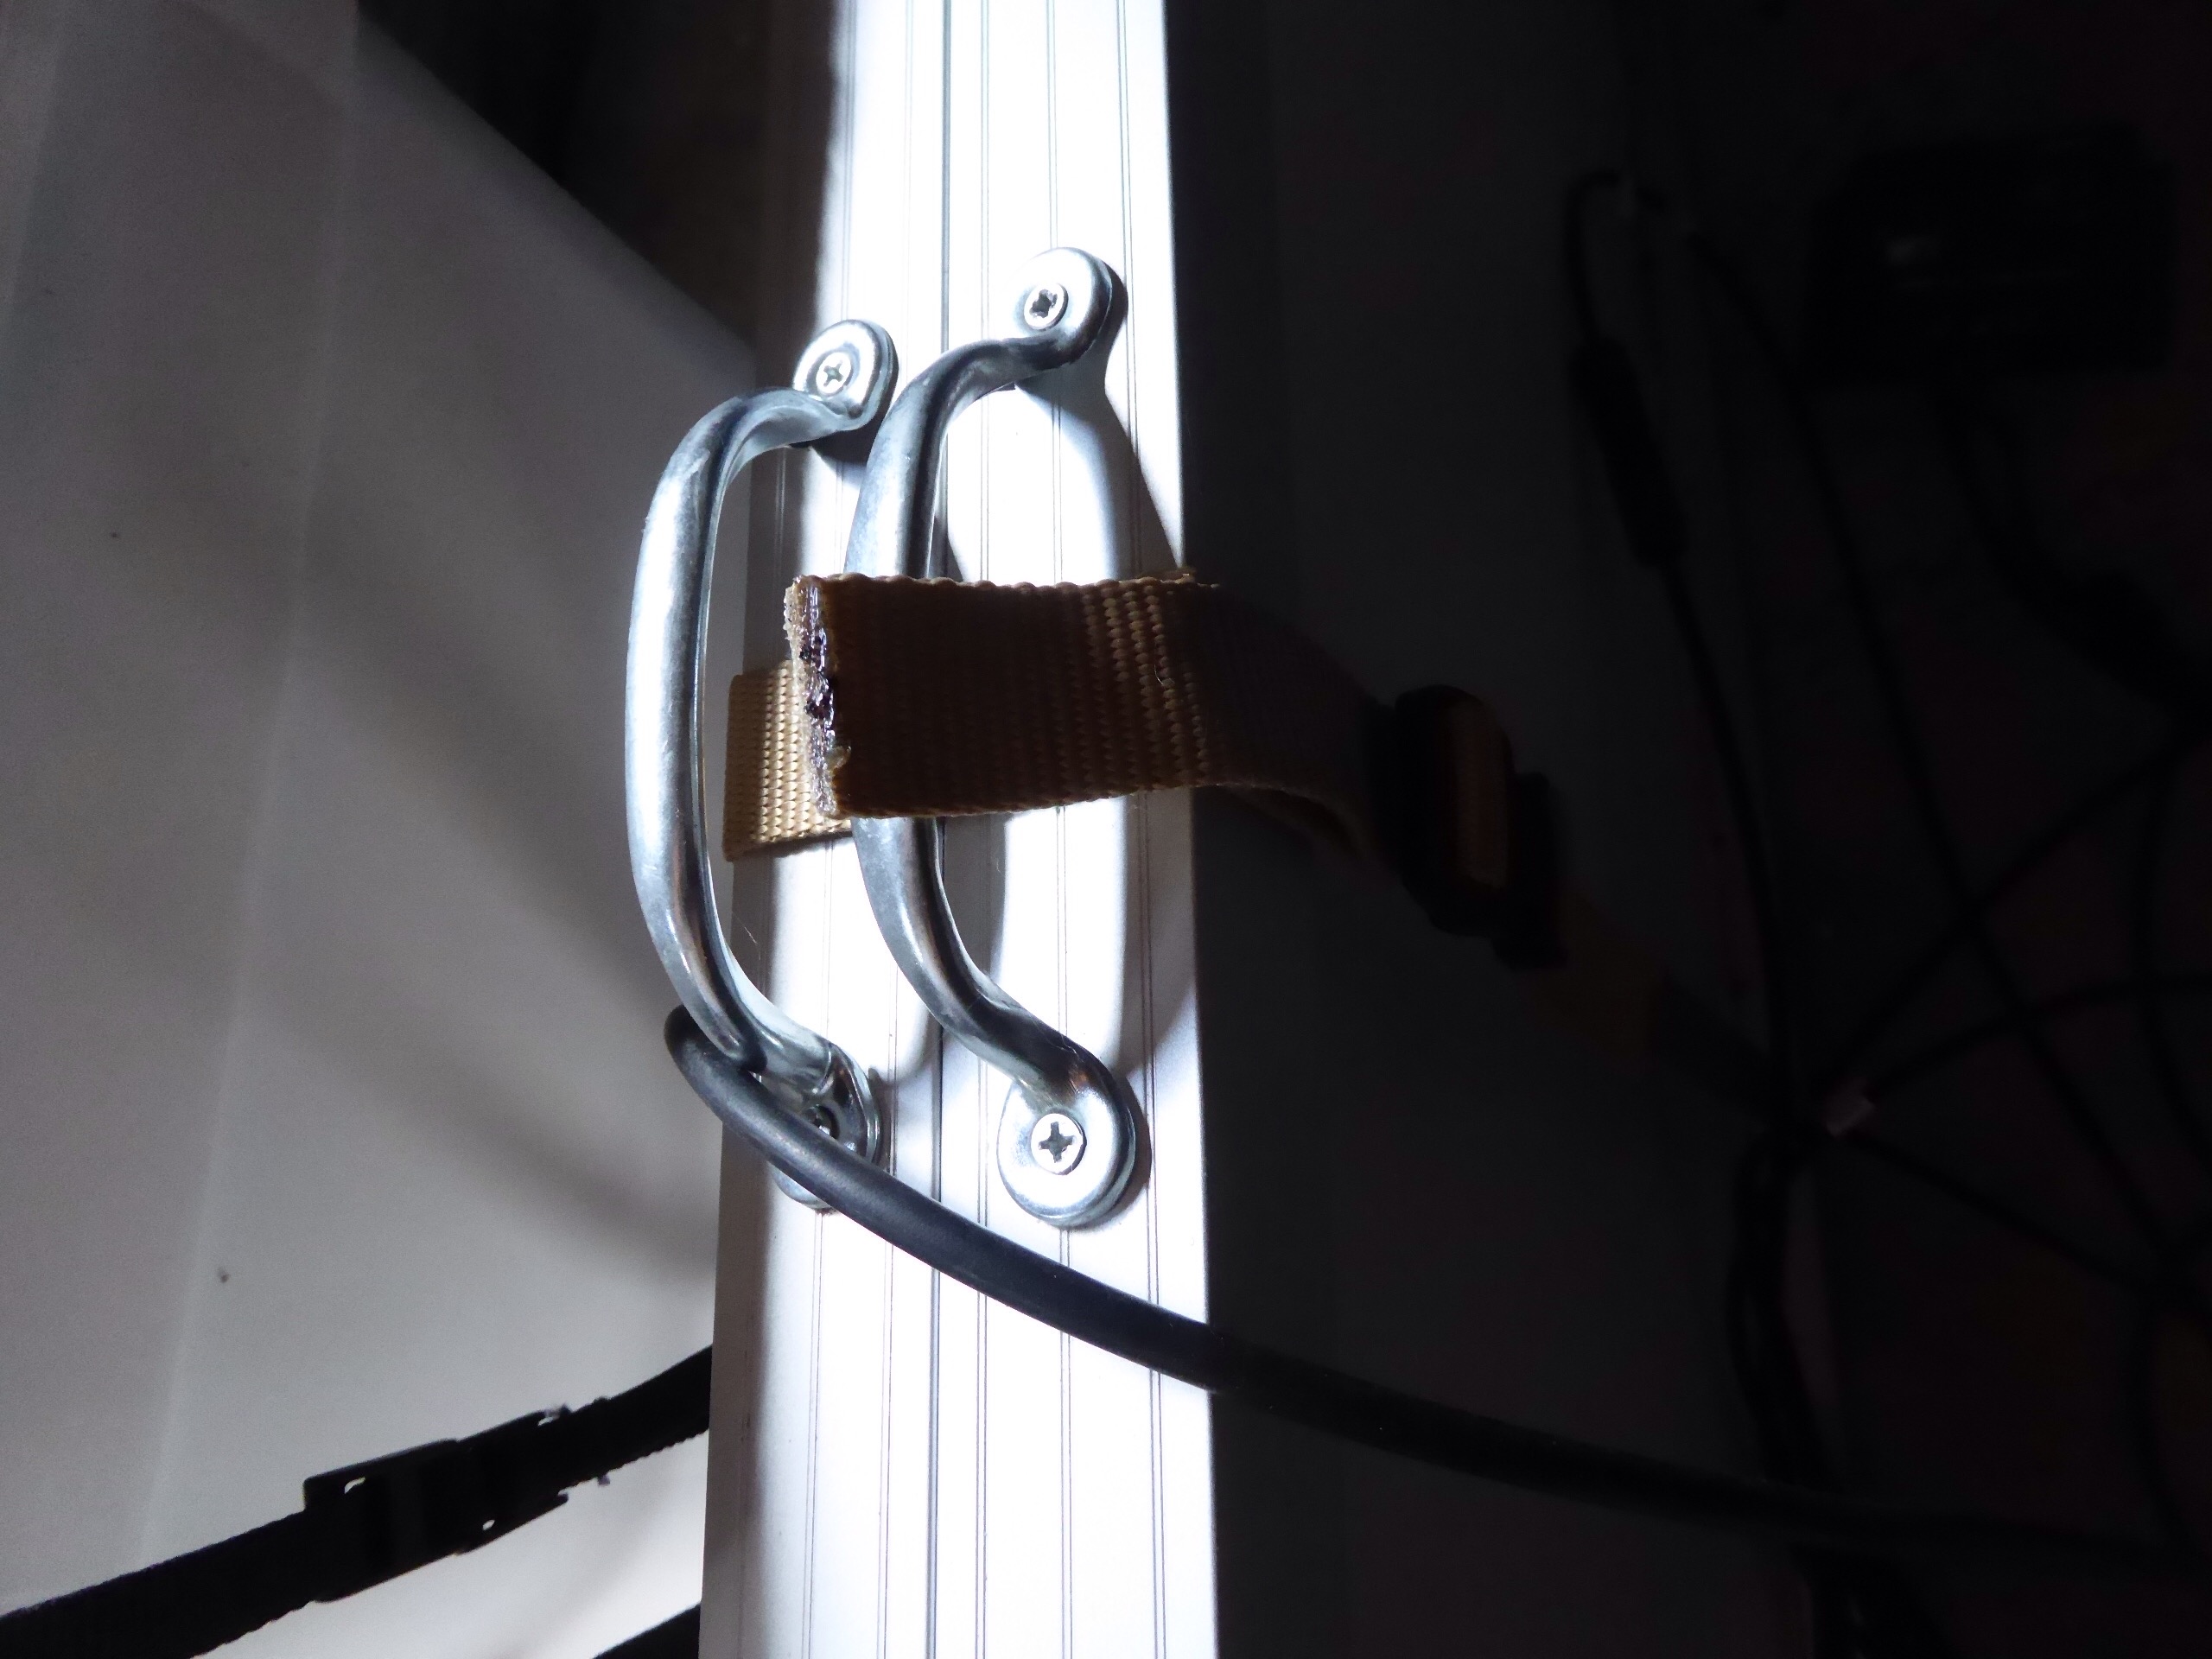
We already had a couple of 12V 85W HQRP panels at home so using what we had, we put a piano hinge on the short ends and two inexpensive drawer handles on the top of each panel–making a tidy stow possible with a strap.

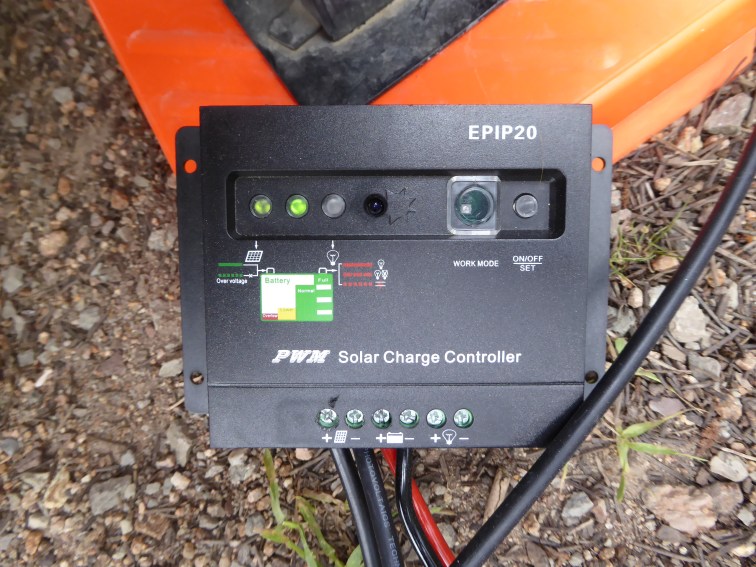
We connected the panels with 25’of 10Ga solar cable to the charge controller, a middle of the road EPIP20 PWM model that came with the panels, that we don’t have to worry about when we leave the site unattended.
An MPPT converter is more efficient, but costly and heavy. The 12V panels are in series to reduce power loss along the cables, and the controller steps that 24V down to the right level for a 12V battery.
The controller is connected to the camper/battery by 10Ga twin-lead stranded cable, using 50A Anderson Powerpole connectors (https://powerwerx.com/anderson-sb-connectors-sb50-50amp?gclid=cm-o7smioc8cfug7gqod-j0fng).
We like the Anderson connectors because they easily click together, with no tools nor exposed contacts. (Note: The crimping tool for these connectors makes the connections a snap and we found worth the expense). We attached dust shields because road dirt manages to enter the battery cave.
From the battery compartment posts we connected two sets of cable, with connectors–one for the controller, and one for a second battery that I could place on the ground to double the capacity. We used a yellow pair for the controller connection, and a red pair for the spare battery connection, just to clarify what goes with what.
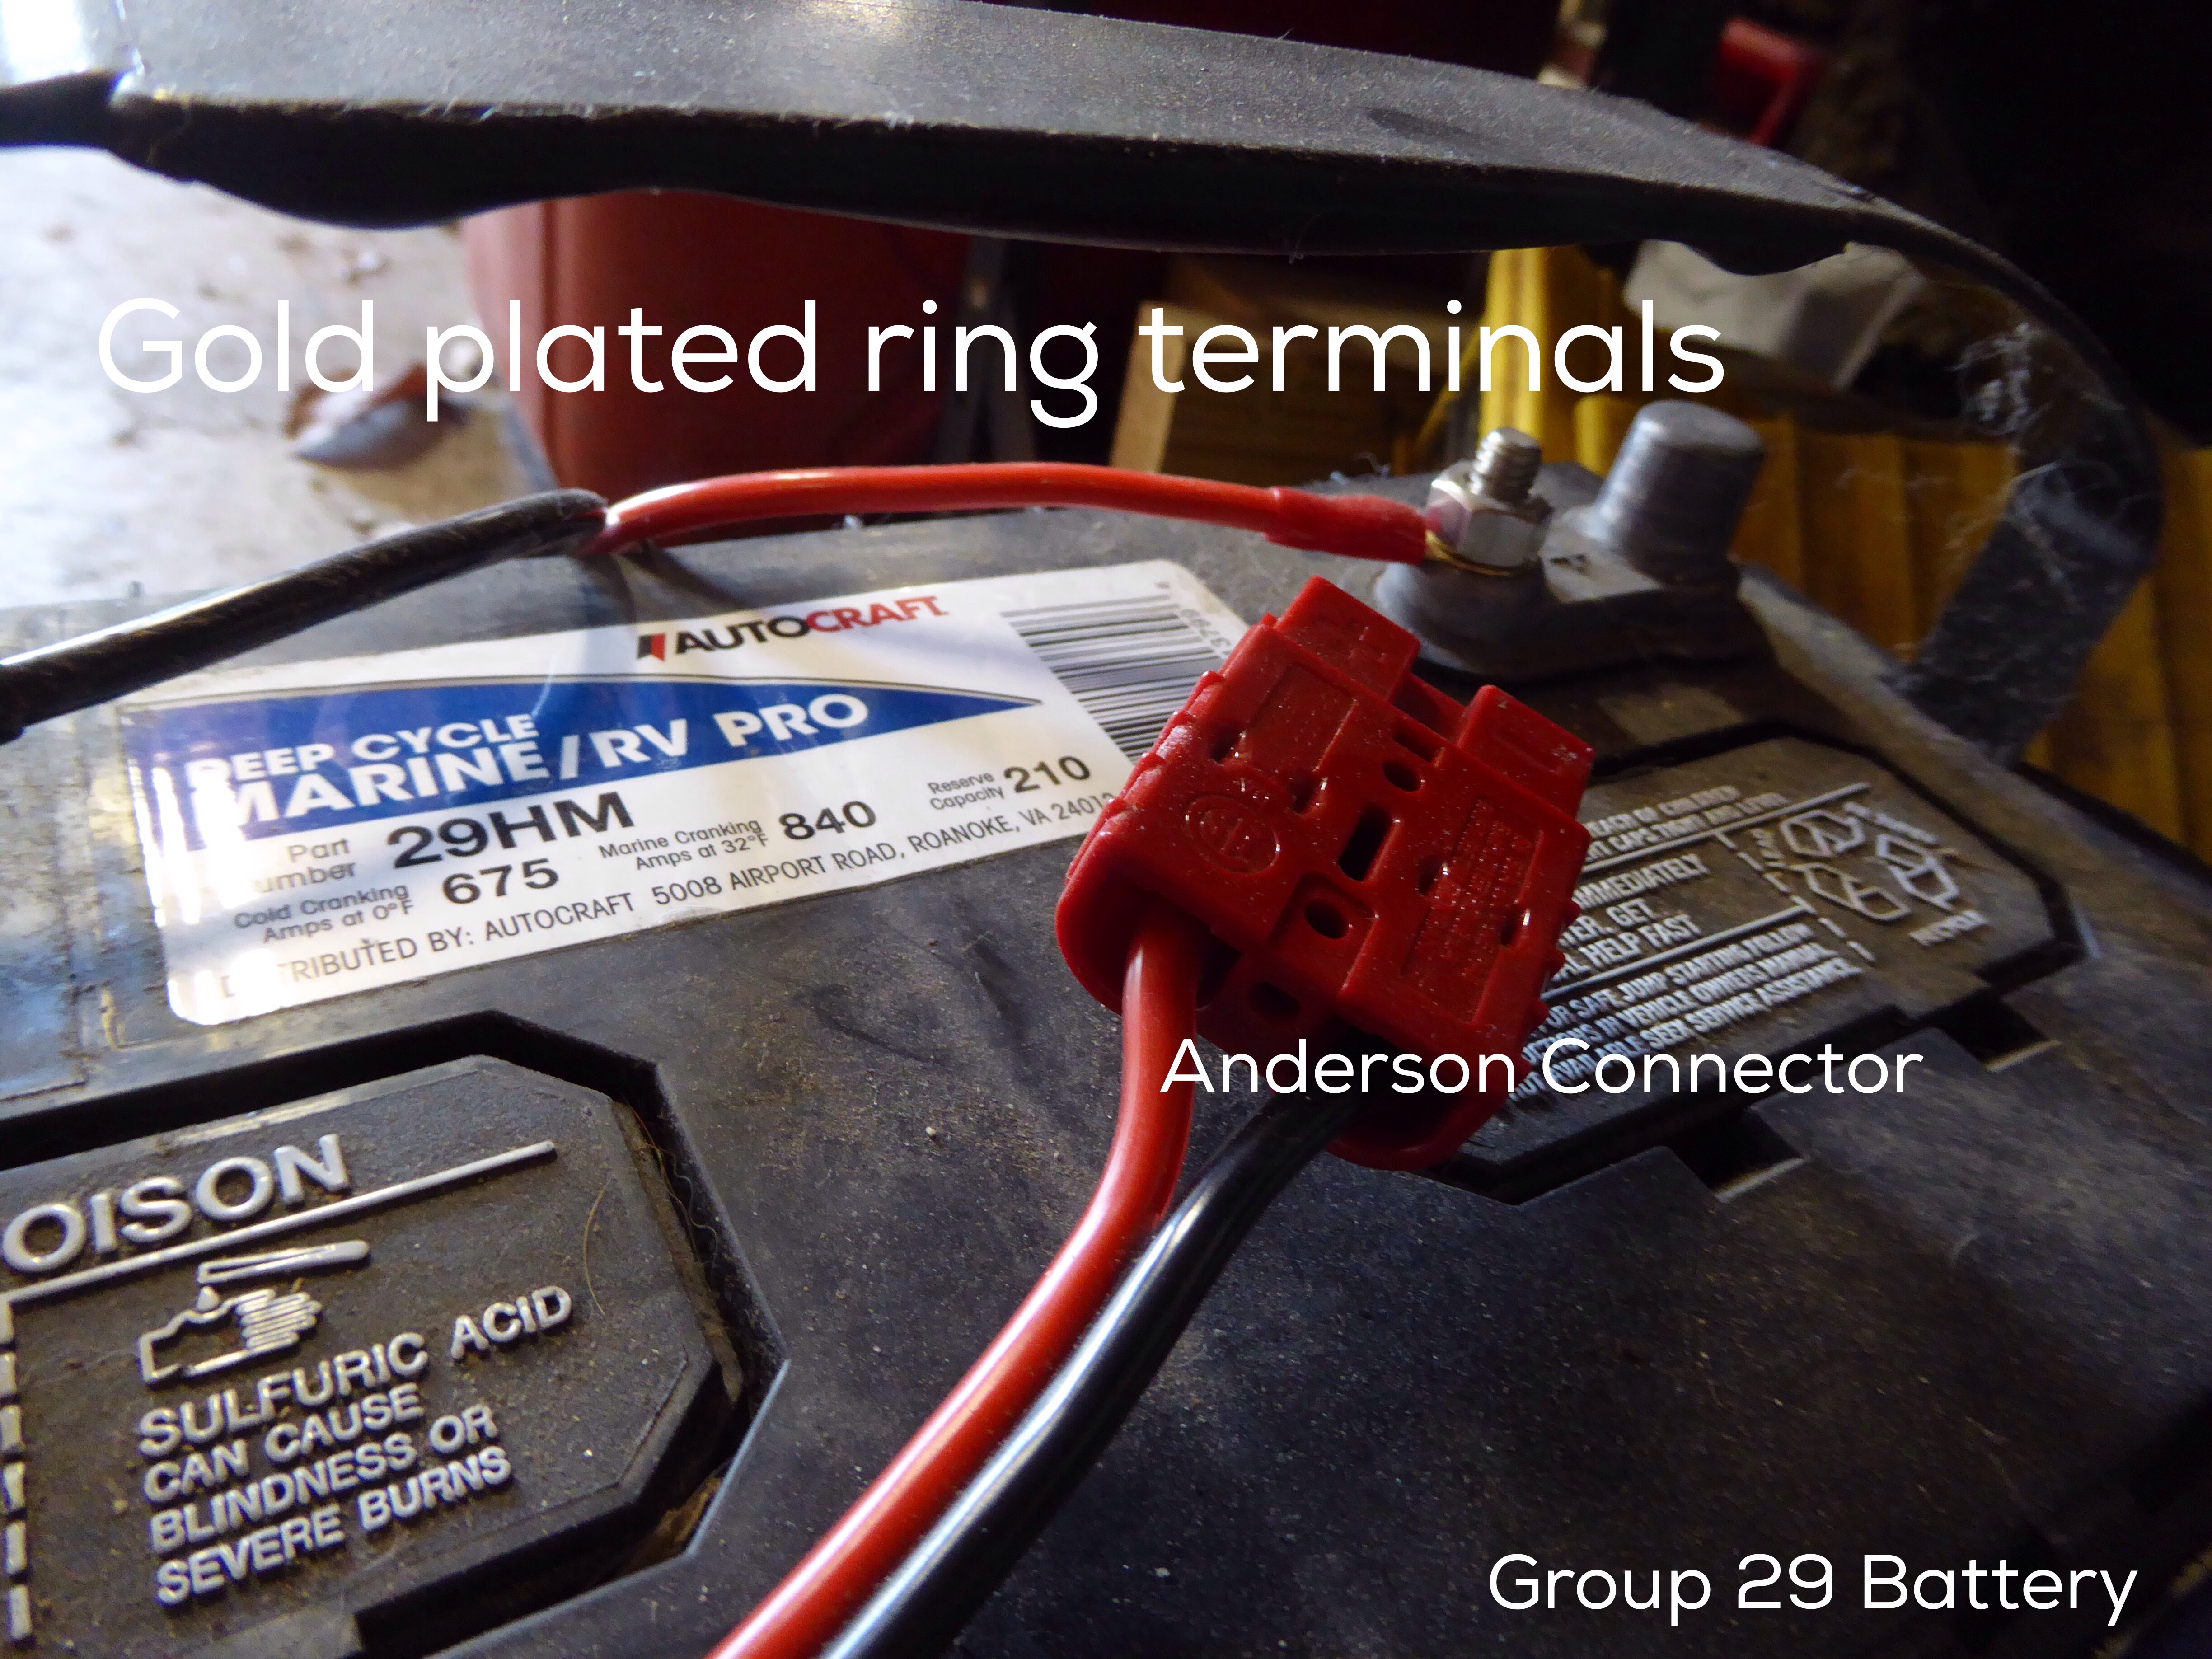
Connect the cables to the camper’s connection terminals and to the spare battery using gold plated ring terminals from parts-express.com.

We also replaced the Group 27 battery, when it died after a year, with a Group 29 battery, which has much more capacity. Had to use a good bolt to secure the battery removing the bracket (because the bigger battery wouldn’t fit without removing that bracket.)
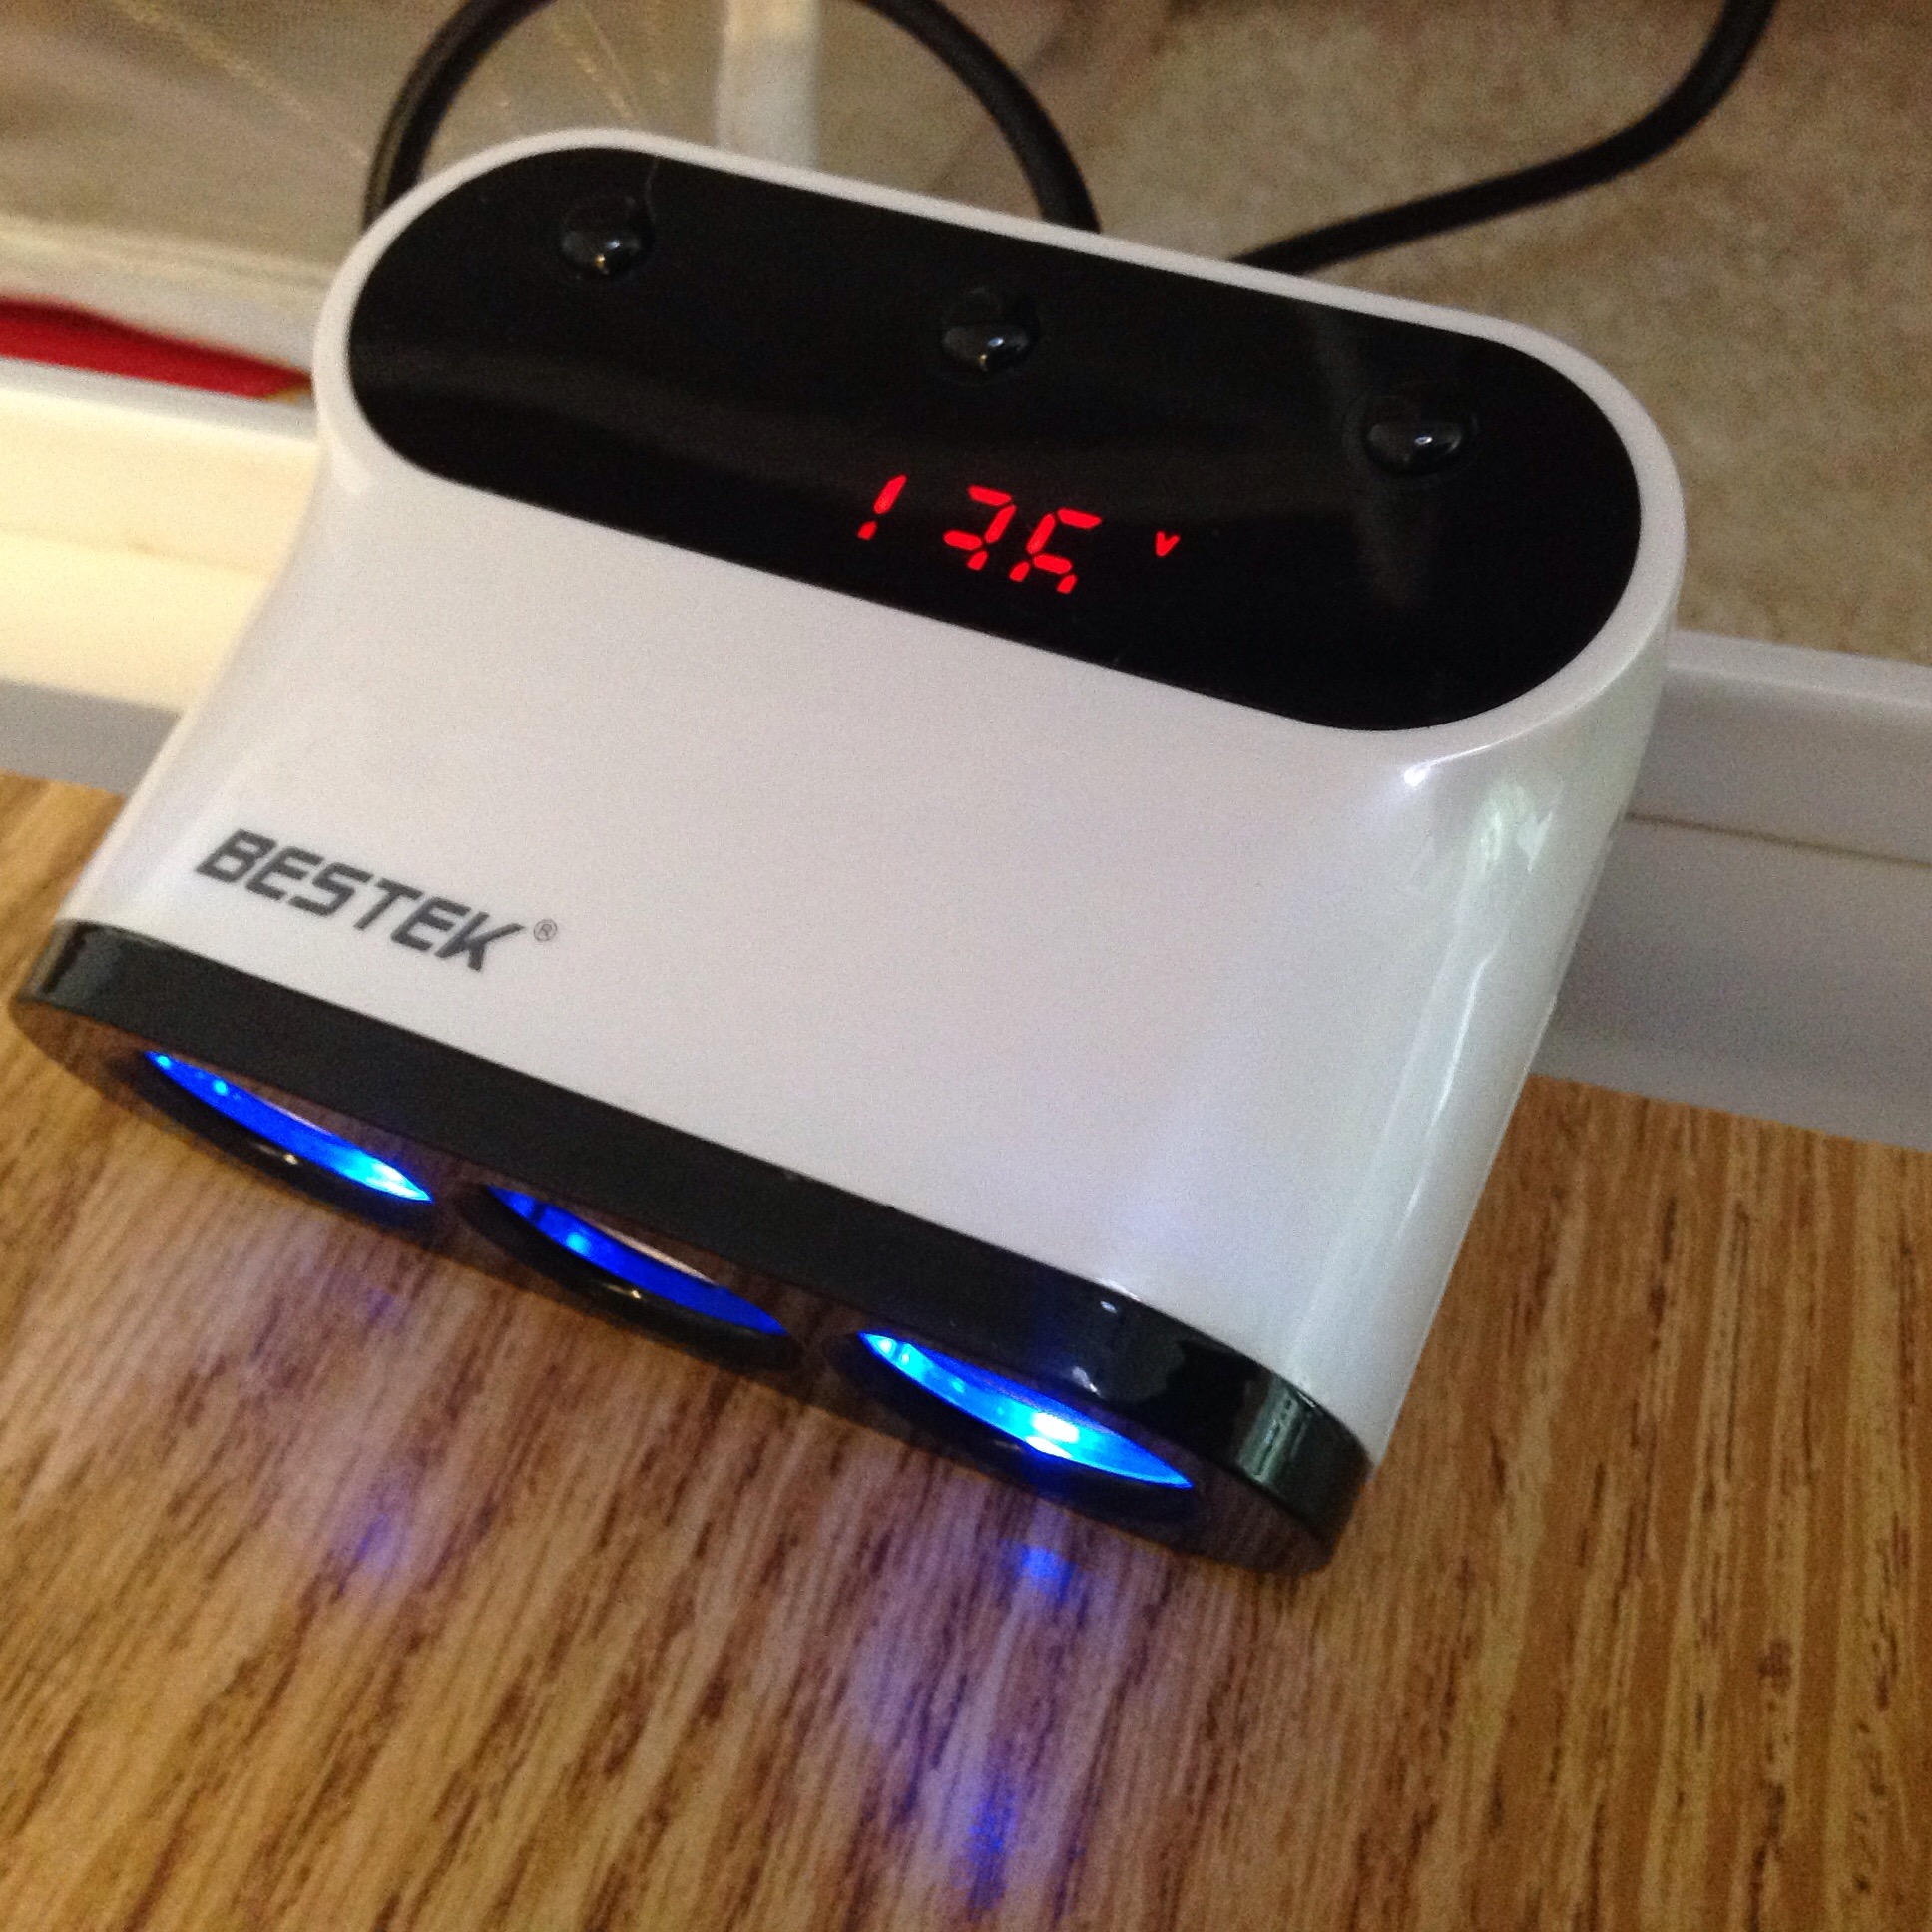
After finding a sunny spot, be sure to monitor the battery voltage, with a simple DC voltmeter. We have one on a 3-way 12V splitter/ USB port that we like because it allows us to re-charge speakers and electronics at one time. Beware that several devices seem to read 0.1 or 0.2V high or low, so it would help to compare to an accurate multimeter.
With the panels disconnected, 12.7V is full, and 12.0V is 25%, which we were warned one needs to stay above–advice later proved prophetic as we found ourselves with a dead battery from an inadvertent depletion on our way home from the factory on pick-up day! Oh well, that led us to the bigger battery mentioned above.
To measure correctly, you need to wait a while after charging to remove the excess surface charge, e.g., 13.1V is not a true measure.

It’s important to maintain the battery during storage, and to monitor its health. A BatteryMinder will also slow its aging and warn of weakness or a bad cell.

So, this is a list of parts we used. There are many ways to go about this and lots of helpful sites on solar. Just last trip, a fellow camper told us he loves the site: thatsolarguy.com
- 2 , 12v 85W HQRP solar panels (Google for best/latest)
- 2 metal screw-in handles, a piano hinge and a strap (Home Depot)
- Charge controller (Amazon)
- 2 pair Anderson 50A connectors (Powerwerx.com)
- 25′ 10Ga twin copper cable (Powerwerx.com)
- 2 or 6 Gold plated ring terminals, 3/8″and 5/16″, for camper and battery posts (parts-express.com)
- An extra group 29 battery
Feel free to share and to follow this blog if you find it helpful.
©2016zenandtheartoflittlehousetravelling.com All rights reserved.

*sigh……..It just makes me want to take a detour trip and beg you and the hubs to just hold my hand and take me shopping and help me set up everything for solar. I am not a fan of electricity or things that spark, I am good at a lot of things, but this is all so foreign to me. Oh wait, maybe you and the hubs need a trip to Yellowstone Park with a side solar expedition LOL
LikeLike
Read about the Renogy suitcase systems. They are more plug and play. We wanted bigger panels because we already owned them and because we camp in very shady spots, often.
We were just out in your neck of the woods and we would have helped you. As in all things, the daunting part is the part just before one digs in–when one is listening to the “I think I can’t” voice. It’s not so complicated. Knowing what to buy gets you most of the way home.
LikeLiked by 1 person
Thanks for the info!
LikeLike